How to Make a DIY Balcony Railing Bar
Although balconies are great for enjoying the outdoors, they can quickly feel very short on space. If you’ve ever tried to sit two or more people on a small apartment balcony, you probably already know this is the case.
A great solution is a balcony railing table because it provides extra surface area without any footprint. Annoyingly, most online options for buying one are expensive, especially when you factor in shipping.
This article covers step-by-step instructions for a DIY balcony railing bar. Building one yourself not only feels like an achievement but also means you can make it to your exact size specifications.
Read on for detailed instructions on how to build a balcony railing bar.
Advantages of a DIY Balcony Bar
We’ve already covered the most important advantages of making a balcony railing table yourself:
- It saves money
- You can make it to the correct size
If you go one step further and find some reclaimed lumber, you could build one for almost nothing.
Also, it gives you full customization over the look and color, meaning you can make it to match the rest of your balcony’s style. This is much easier than searching online for a very specific balcony railing table.
Most Common Uses
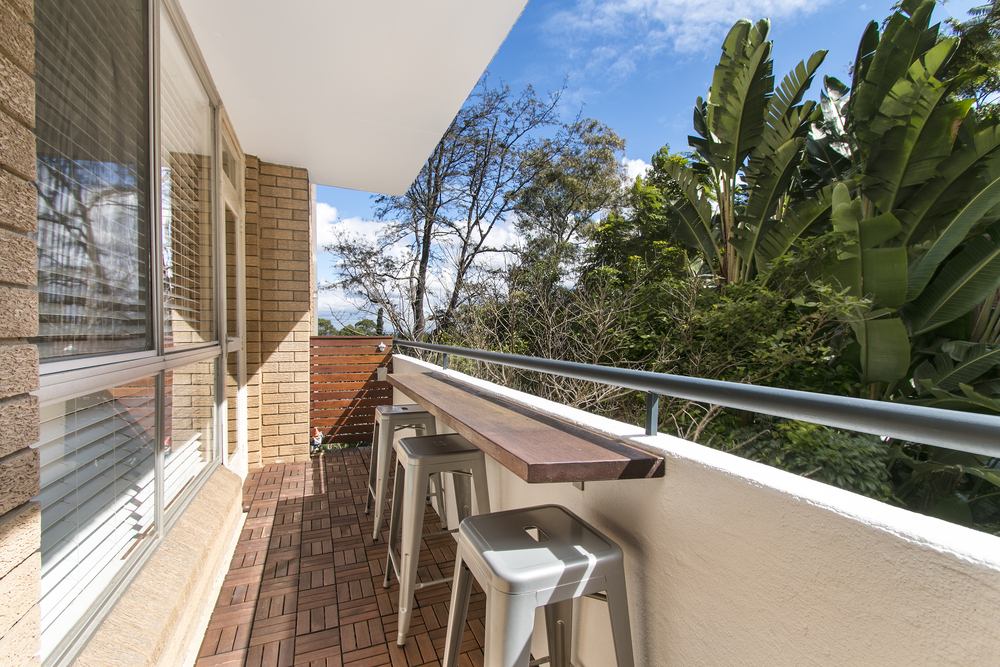
Realistically, the uses for a balcony railing bar are the same as any other table. That said, the most common include:
- Outdoor office (desk)
- Table for plates/condiments/food when eating outdoors
- Coffee bar
- Somewhere to put your drinks
The most important difference between a railing table and a normal table is that the former is designed to save space. By not sitting on the floor, it’ll save room that you could use for an extra chair, a BBQ, or more plants!
Supplies Needed
The instructions below cover two types of balcony railing table: a static one and a folding table for balcony railings. Most of the supplies are the same for both, but the extra supplies needed for the folding table will be mentioned below.
For a DIY balcony railing bar, you’ll need:
- 1×6 boards
- 1×2 boards
- Flathead exterior wood screws (1.5” is fine)
- Wood clamps
- Wood glue
- Wood stain or paint for exterior use
Of course, you’ll also need a saw and screwdriver/drill. And don’t forget your safety equipment!
Instructions for Building a Static Balcony Bar
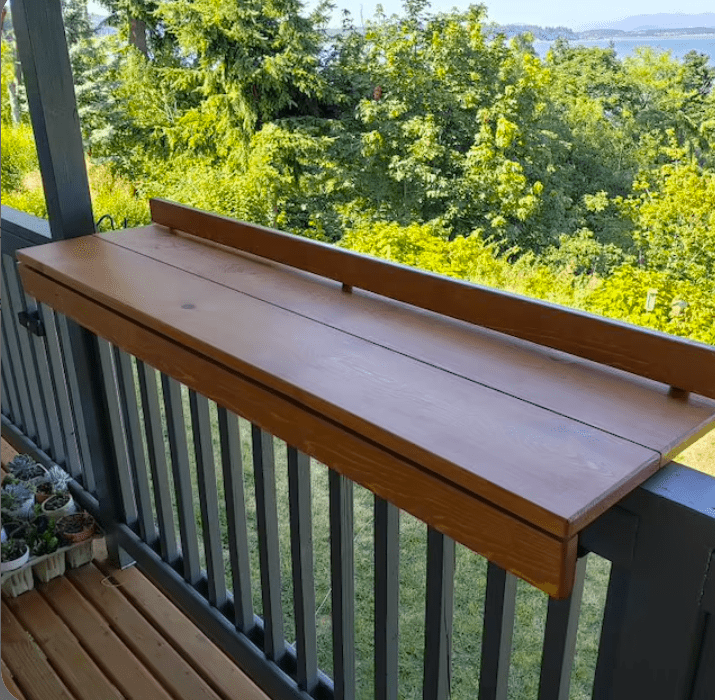
Providing you’ve got a bit of DIY knowledge, this shouldn’t be too difficult to build. Here’s the method for the static railing table.
1. Measure your balcony railing
Your table needs to fit tightly on the railing, as you won’t be fixing it down with anything. Measure the railing and use this as the basis.
For the sake of convenience, the method below uses a railing width of 5.5”, the same as a 1×6 board. If your railing is narrower, you might want to choose thinner boards.
2. Cut boards to the right length
How long your balcony railing table will be is entirely up to you. Consider making it the same length as two or three dinner plates plus a little extra.
Cut two 2×6 boards to the right length and then cut three about 0.5” shorter. These will form the underside that wraps around the railing.
You can do this with a handsaw, but a power saw is much easier.
3. Start gluing
Take your two long boards and apply glue to one long edge. Clamp together and screw in some pocket screws if you want. They’re entirely optional, though.
While this is drying, drill countersink holes in your shorter boards. It ensures the screw heads sit flat, meaning the boards do too. Check out this video for more information.
Each shorter board will have two screws, meaning you need four countersunk holes in total. These will be 3/8” from one of the long sides.
When the long boards have dried, drill countersink holes around 3/8” from the edge. These are for the lip.
4. Attach the bottom boards
You should have three boards to form the underside of the table. Glue one down the middle of the two long boards (on the bottom). Fix in place with four screws.
Next, glue along a long side of each board and stick to the long board against the edge of the board you just fixed down. You then need to screw it in place against that board using the countersunk holes.
Test it fits on your railing before the glue dries. Providing it does, give it a few hours to cure before moving onto the next stage.
5. Fix the rim in place
Take your 1×2 board and cut it into three pieces. One should be the length of the balcony railing table, and the other two should be the width, minus 0.75”.
Apply glue to the edge of the table and fix them in place. Clamp them down and let the glue dry. Once it has, screw them in place from underneath using the countersunk holes from earlier.
6. Paint and install
Once everything is dry, you can paint or stain the table however you choose. Of course, make sure you sand it and clean it first.
Be sure to use exterior paint or to varnish it if you’re using interior paint. You can paint the underside, but just be aware that stain might rub off on the balcony railing.
Finally, you just set it in place, and you’re done!
Instructions for Building a Folding Balcony Bar
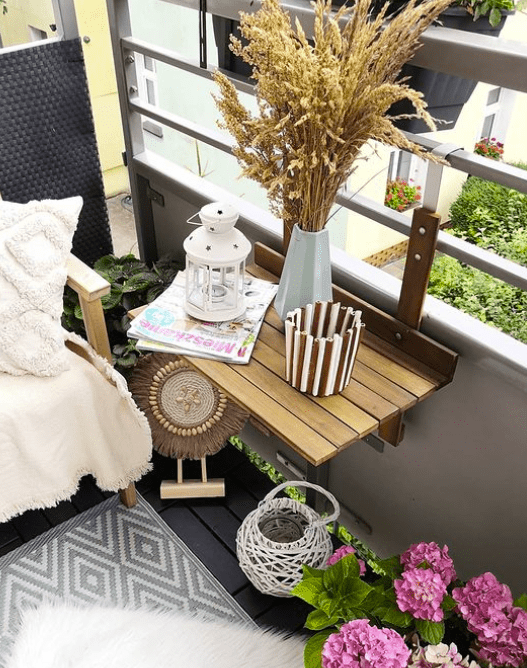
The instructions for a DIY folding balcony table aren’t much different. You’ll still build the tabletop following the instructions from steps 2 and 3 above, but you can make the table whatever size you want.
Assuming you’ve built a tabletop, or will follow the instructions above, the rest of this method details how to make it a folding table for balcony railings.
The extra supplies you’ll need are:
- Folding shelf brackets
- Hose clamp strapping
- 2 extra 1×2 boards
This method is super easy and assumes you’re fixing the table to metal balcony railings. A suggestion for how to fix this folding table to a solid balcony is explained below.
1. Build your posts
Measure two posts roughly the same height as your balcony railing. Screw a folding shelf bracket to each.
2. Attach the posts
Attach the posts to your balcony railing using the hose clamps. You’ll probably need two clamps per post for security.
Ensure the posts are spaced properly. You ideally want each to be an inch or so from the edge of the tabletop.
3. Screw down the tabletop
Finally, screw down the tabletop using countersunk holes and flathead screws. That’s basically all there is to it.
You can check out this video for a quick and easy visual explanation of this method.
How to Install a DIY Balcony Railing Bar
The first balcony railing table works best on railings that have a defined top rail. But, it could be any type of balcony (glass, concrete, metal bars, etc.), as all you’re doing is resting the table on top.
Of course, it’ll feel safer on balconies with a wider top rail. It’s probably best to avoid this kind of table on balconies with a rounded top rail, as it could slide off. Instead, opt for the folding table.
The folding table is easier to adjust for different kinds of balconies. If your balcony is solid (doesn’t have vertical rails), simply replace the posts with umbrella holders, torch clamps, or a clamping bird feeder holder.
All of these can be modified to suit the instructions, you’ll just need to use cylindrical posts rather than square ones. Work out what kind of hook or clamp would best suit your balcony railing and adjust the instructions accordingly.
Final Thoughts on DIY Balcony Railing Bar
Building and installing a balcony railing table is surprisingly easy. With just a few bits of wood, you can create a convenient balcony railing bar that saves space.
Of course, the folding table for balcony railings is even better for space-saving. It just requires a few more materials, but these are easy to get.
Whichever you choose to build, prepare to enjoy your new DIY balcony bar!


