How to Grow (and Maintain) Arugula on an Apartment Balcony in 5 Minutes a Day
Growing fresh vegetables might seem impossible when you live in an apartment, but arugula is the perfect green for balcony gardeners. This peppery, nutrient-rich leafy green grows quickly, requires minimal space, and can be harvested multiple times from a single planting. Whether you’re a first-time gardener or a seasoned pro working with limited space, this guide will help you grow abundant arugula with surprisingly little effort.
Getting Started: Containers and Placement
Choosing the Right Containers
The first step to balcony arugula success is selecting appropriate containers:
- Depth matters more than width: Choose containers at least 6 inches deep to accommodate arugula’s root system.
- Consider weight restrictions: Plastic or fabric grow bags are lightweight alternatives to ceramic or terracotta pots.
- Drainage is crucial: Ensure your containers have adequate drainage holes to prevent root rot.
- Space-saving options: Window boxes that attach to railings or vertical planters can maximize limited balcony real estate.
For beginners, a simple plastic container about 12 inches wide and 6-8 inches deep will suffice for growing enough arugula for regular harvests.
Strategic Placement
Arugula grows best with:
- 4-6 hours of sunlight: Morning sun is ideal, as afternoon sun can be too intense in summer months.
- Protection from strong winds: Position containers against walls or use larger plants as windbreaks.
- Accessibility for easy harvesting: Keep containers within easy reach for quick snipping.
Remember that many balconies have microclimates—observe your space for a few days, noting which areas receive sun and shade throughout the day before finalizing placement.
Soil Selection and Planting
Seeds vs. Seedlings
You have two options for starting your arugula garden:
- Seeds: Most cost-effective and widely available option. Purchase arugula seeds from:
- Garden centers and nurseries
- Online seed retailers (Johnny’s Selected Seeds, Burpee, Baker Creek)
- Home improvement stores with garden sections
- Some grocery stores with gardening displays (seasonal)
- Seed libraries or exchanges in your community
- Seedlings/Starter Plants: For a head start on harvesting:
- Available at farmers’ markets in spring and fall
- Local nurseries and garden centers
- Some grocery stores sell living arugula plants with roots intact
- Community garden plant sales
Starting from seedlings gives you a 2-3 week jumpstart on harvesting, while seeds offer better value and more variety options. Both have excellent success rates in container gardens.
Preparing Your Growing Medium
Arugula isn’t particularly fussy about soil, but it grows best in:
- Well-draining potting mix: Use a commercial potting soil designed for containers, not garden soil.
- Pre-fertilized options: Choose potting soil with slow-release fertilizer for truly minimal maintenance.
- Lightweight mixes: Look for formulas containing perlite or vermiculite to improve drainage and reduce weight.
A simple approach: purchase a quality organic potting mix and add about 20% compost if available.
Sowing Seeds
Arugula’s rapid growth begins with proper sowing:
- Fill your container with potting mix to about 1 inch below the rim.
- Scatter seeds lightly over the soil surface—about 1 seed per square inch.
- Cover with a thin layer of potting mix, about ¼ inch deep.
- Water gently using a spray bottle or watering can with a “shower” head attachment.
Pro tip: Instead of planting all at once, sow seeds in sections every two weeks for a continuous harvest that won’t overwhelm you.
Minimal Maintenance Routine
Watering Wisely
Arugula needs consistent moisture but not soggy conditions:
- Check soil moisture by inserting your finger about an inch into the soil—water when it feels dry at this depth.
- Morning watering is best to prevent overnight dampness that can encourage fungal issues.
- Self-watering options: Consider self-watering containers or simple watering globes for times when you’re busy or away.
Most balcony arugula needs watering every 2-3 days, though this varies with weather conditions and container size.
Fertilizing (Barely Necessary)
With good potting soil, arugula needs minimal additional feeding:
- Optional boost: Apply a diluted liquid fertilizer once when seedlings reach 2 inches tall.
- Less is more: Overfertilizing produces bitter leaves and excessive growth that’s more prone to pests.
If your arugula looks pale or growth seems slow, a light application of liquid seaweed or all-purpose vegetable fertilizer at half-strength is sufficient.
Protecting from Common Challenges
Balcony gardens face unique challenges, but simple preventative measures make a big difference:
- Temperature fluctuations: Move containers to shadier spots during heatwaves or place them closer to the building for warmth during cool spells.
- Wind protection: Create windbreaks with other plants or temporary barriers during especially windy days.
- Pest management: Check leaf undersides occasionally for aphids—a quick spray of diluted dish soap (1 teaspoon per quart of water) is usually sufficient if you spot them.
Harvesting for Continuous Growth
What is Harvesting?
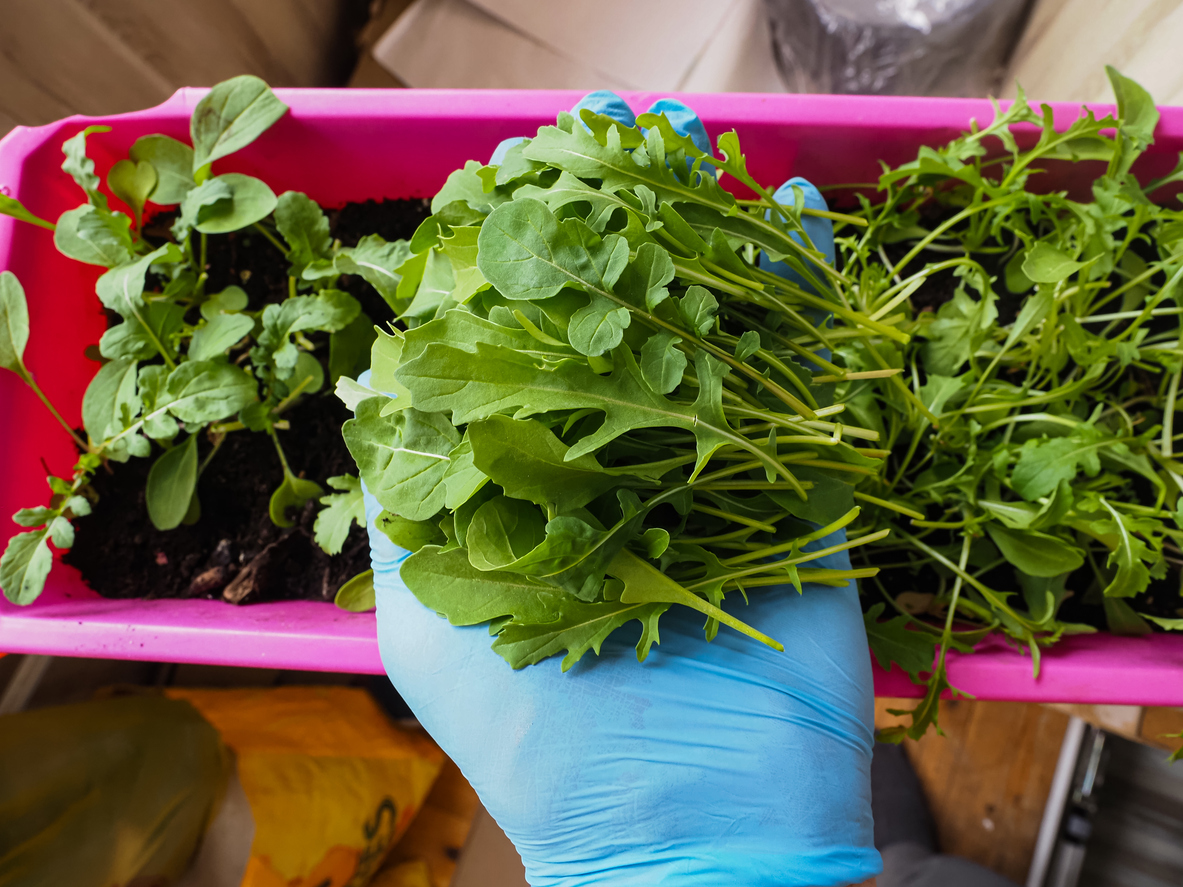
Harvesting simply means collecting or picking the leaves you want to eat. With arugula, harvesting is the process of cutting leaves from the plant to use in your meals. Unlike many vegetables where you harvest once and the plant is finished, arugula can be harvested multiple times from the same plant if done correctly. Think of it as giving your arugula a haircut rather than uprooting the entire plant.
When to Start Harvesting
Arugula can be harvested at different stages:
- Baby greens: Ready in as little as 21 days, tender and mild.
- Full-sized leaves: Available after 30-40 days, with more pronounced peppery flavor.
Harvesting Technique
The secret to multiple harvests is proper cutting:
- Use clean scissors to avoid damaging plants.
- Cut outer leaves first, taking just what you need for your meal.
- Leave at least 2 inches of the center growth intact.
- Harvest in the morning when leaves are most flavorful and crisp.
With this “cut-and-come-again” method, a single planting can provide harvests for 3-4 weeks or more.
When to Replant
Even with proper harvesting, arugula eventually flowers (bolts), especially in warmer weather:
- Replanting trigger: When stems elongate and leaves become smaller and more bitter, it’s time for fresh plants.
- Quick transition: Prepare a new container while your current plants are still producing, or replant in sections to avoid gaps in your harvest.
Seasonal Considerations
Arugula prefers cool weather, making it perfect for growing:
- Spring: Plant as soon as nighttime temperatures consistently stay above 40°F.
- Fall: A second growing season when temperatures cool in late summer/early fall.
- Winter: Possible on balconies in mild climates (Zones 8-10) or with protection.
- Summer: Challenging but possible with afternoon shade and frequent harvesting to prevent bolting.
Year-Round Growing Possibilities
Growing arugula year-round depends largely on your climate:
- Mild climates (USDA Zones 8-10): Year-round growing is possible with minimal adjustments. In summer, provide afternoon shade and more frequent watering. In winter, position containers in full sun.
- Moderate climates (USDA Zones 5-7): Expect a growing break during both summer heat and winter cold. Focus on spring and fall as your primary growing seasons. Extend these seasons by moving containers to protected areas or using simple coverings during mild frosts.
- Cold climates (USDA Zones 4 and below): Indoor growing may be necessary during winter months. Consider a small indoor setup near a south-facing window or under grow lights during the coldest months. Resume outdoor growing when nighttime temperatures remain above 40°F.
For year-round arugula regardless of climate, some apartment dwellers create a small indoor growing area using compact containers and inexpensive LED grow lights for winter months when balcony growing isn’t feasible.
Final Tips for Success
- Start small: One medium container is enough to learn the process before expanding.
- Keep it visible: Place your arugula where you’ll see it daily, making it easier to remember maintenance.
- Harvest frequently: Regular cutting encourages new growth and prevents flowering.
- Save seeds: Let one plant flower and go to seed for free planting material next season.
Growing arugula on your balcony is one of the most rewarding and least demanding forms of apartment gardening. With minimal setup time, just a few minutes of weekly maintenance, and a proper harvesting technique, you’ll enjoy fresh, flavorful greens that cost less and taste better than anything from the supermarket.
Your balcony garden journey starts with a single container—and arugula’s quick growth means you’ll see results fast enough to stay motivated and excited about your new mini garden.